
This is a historical opportunity for UX designers. Technological advance leaves people out, but for real innovation needs to bring us in.
Using modifiers to create color ramps can significantly reduce the tedious work that comes with creating color ramps.
If you want to learn about color for design systems, check out some of my other articles in this series here.
🎨 Follow along in Figma: Community File
Using color modifiers to build color ramps
This approach is excellent for maintaining consistency across colors but at the cost of granular control over each color stop. It’s been working great for me, but it might not be the right approach for every system. Defining colors for a design system is pretty tedious. This cuts the work down dramatically in the exploratory phase when adjustments need to be made during contrast ratio checks or needing to change the vibrancy across all colors.
Additionally, this strategy can be a little tricky if you’re trying to create a color ramp where multiple brand colors live in the same ramp that must match what the brand team delivered — but it’s not impossible. It’s a perfect method for building your color palette from scratch.
I use Tokens Studio to manage all my design tokens, so I will use it to show you how I use their color modifying feature to create all my color ramps. This does require a pro membership. Leonardo.io is also a great tool for achieving a similar effect.
Let’s get started!
1. Create your base colors
These are your middle-of-the-road colors and the ones you will be modifying by making them lighter and darker to create your color ramps.
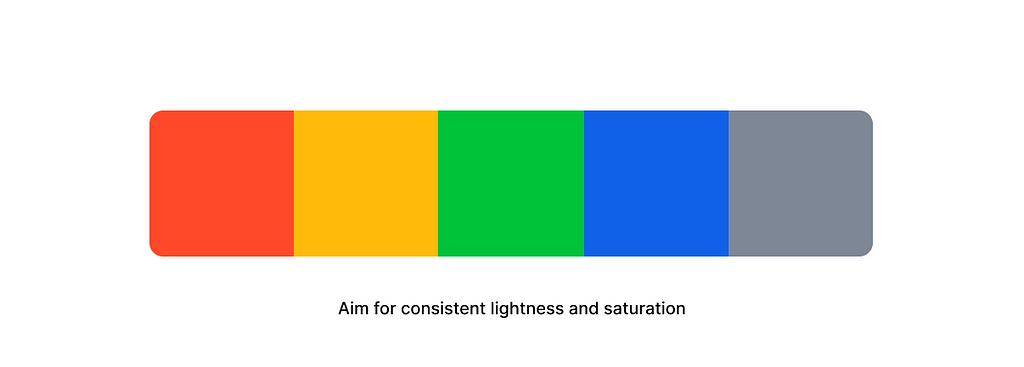
These are likely your 500 value within your color ramp and will not have any modification to them. When refining these colors, aim for consistent lightness and saturation across each one.
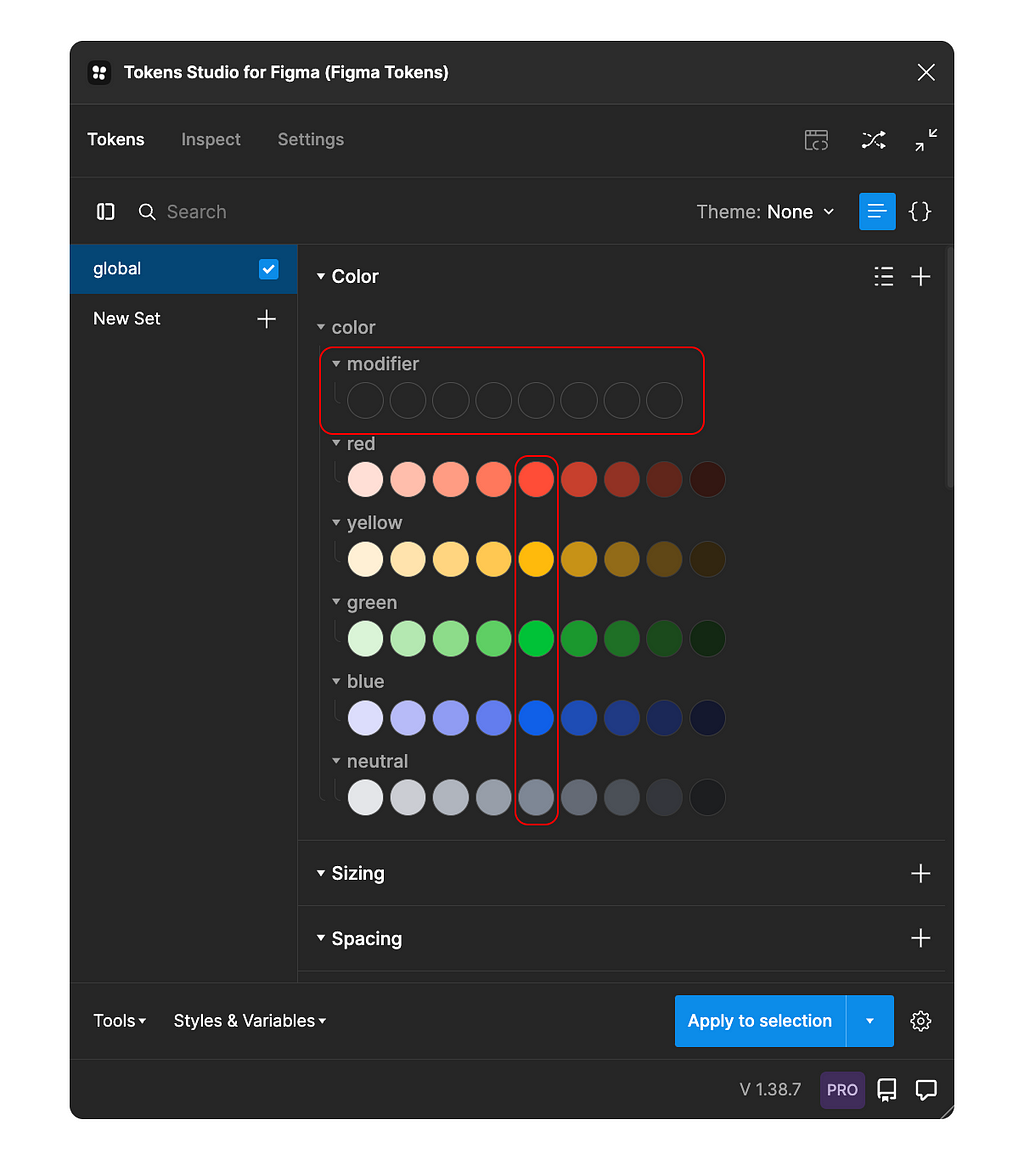
2. Create color modifier tokens
These tokens will allow you to edit a specific color stop across all your colors. For example, all 100 color values will reference the same {color.modifier.100} token to maintain consistency in lightness and saturation across all 100 color values.
If you want more control over each color stop, skip this step. Instead, you’ll enter a raw value when adding a modifier to a color. Keep an eye on your consistency in lightness and saturation across colors within the same color stop. If values are far off, it will be noticeable.
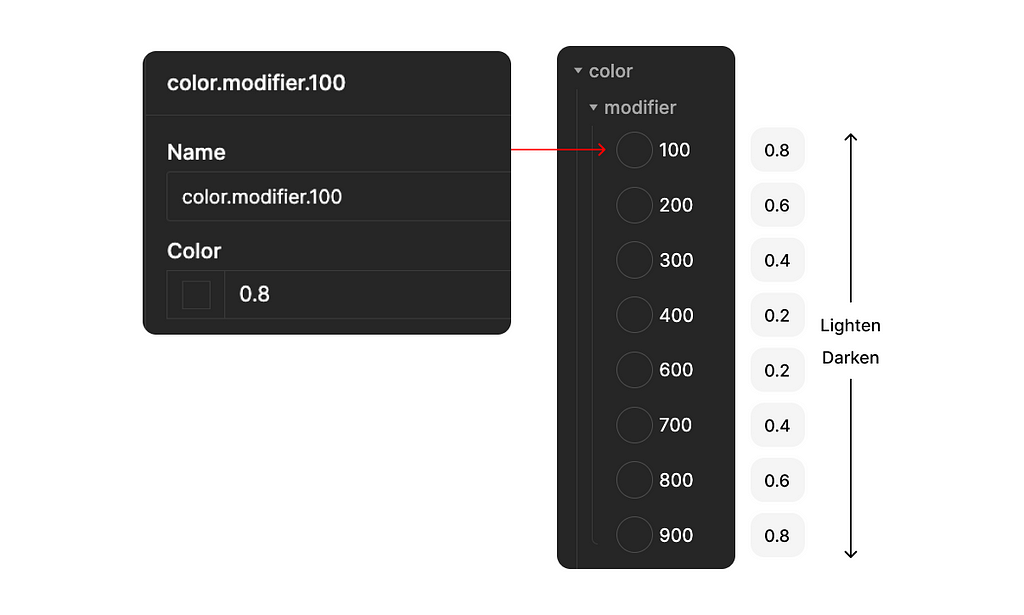
For each color stop, select a value between 0 and 1. This will be the percentage a color will lighten or darken. In the example above, you can see that color.modifier.100 has a 0.8 value, meaning we will want this to lighten from the base color by 80%. We will set the lighten or darken option when creating the color tokens. The value for each token is off to the right, but these are just an example and may change based on how many color stops you need or the desired contrast between them.
3. Add your base color to start your first color ramp
This is done in your global set within the color section of Tokens Studio—where your color modifier tokens also live.
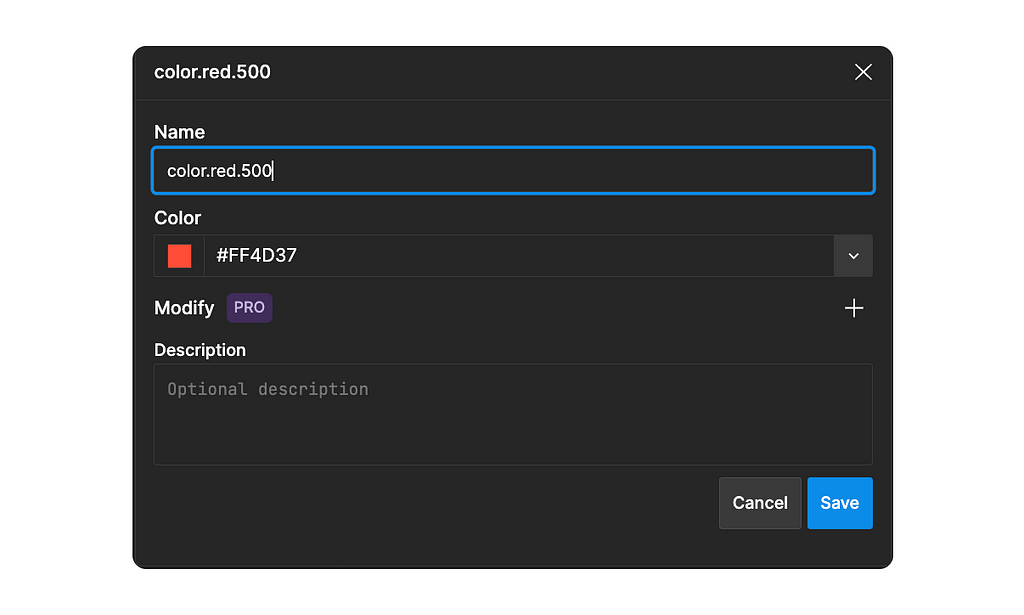
Start by adding a base color token by giving it a name and entering the hex value in the color field. Only do this for one color because we will duplicate this ramp to create the other colors later.
4. Add the remaining colors with a modifier
Let’s add our remaining colors within this color ramp, including the modifier tokens we created earlier. For the following example, let’s add a color one stop lower than our base.
Name field: Add the name of the new token you’re creating, color.red.400.
Color field: Reference your base color, {color.red.500}.
You’ll notice a plus icon button across from the “Modify” label. Click that, and it will reveal the options to modify your base color.
Modify selects: Lighten for colors lower than your base and darken for colors higher. There are a variety of color spaces to work with. I have found the best consistency with lch.
Amount: Reference your color modifier token relevant to the color you’re creating, {color.modifier.400}. It may say “Not found,” but it will work, and you’ll see the base color adjust.
Save it, and a new token will appear in your color ramp. Repeat this process for all your colors.
Don’t forget to set the modifier select field to “darken” for colors higher than your base! It is set to lighten by default.
5. Create all remaining color ramps
I’ll admit this part is a little tedious, but any future adjustments will be easy-breezy.

To add a new color ramp, duplicate the ramp you just created. All you’ll need to do is edit the value of the base color and then adjust the remaining colors to reference that color.
6. Making adjustments to the color ramps
When making adjustments, you’ll either edit the value of your base colors or modifier tokens.
During a contrast ratio check, I may realize that my 900 color stop needs to be a tad darker. No problem! I’ll jump in and increase the value of my color.modifier.900 token.
While exploring color application on a mock-up, I may realize that the colors appear too saturated. No problem! I’ll go back to refining my base colors and adjust the base token values.
I no longer need to worry about adjusting every single stop because I know each color stop will be consistent across all colors.
In Conclusion,
This is a great method for fast iteration once set up, but it’s not perfect for every project. Experiment and decide if it’s right for your design system.
- Create your base colors and aim for consistent lightness and saturation.
- Create the modifier tokens.
- Add your base color to start your first color ramp.
- Add the remaining colors and reference them to a modifier token.
- Create all the remaining colors by duplicating your first ramp and change the reference values.
- Make adjustments as needed.
If you want to learn how to create color ramps manually where you have more control over every color stop, check out “How to create a color ramp used in design systems.”
🖤 Support free educational content:
I love helping others on their design journey and want to keep the educational content I create free and accessible. If you feel inclined, you can support my journey by donating here!
📍 Where to find me:
Twitter, LinkedIn, Posts, Instagram, Website
Creating a color ramp using color modifiers in Tokens Studio was originally published in UX Collective on Medium, where people are continuing the conversation by highlighting and responding to this story.
Leave a Reply