
This past Tuesday, October 1st, Figma launched its first “Release Notes Livestream”, where they announced new features and changes to Figma Design, FigJam, and Figma Slides. Some features were already introduced in September, while others were released just following the livestream.
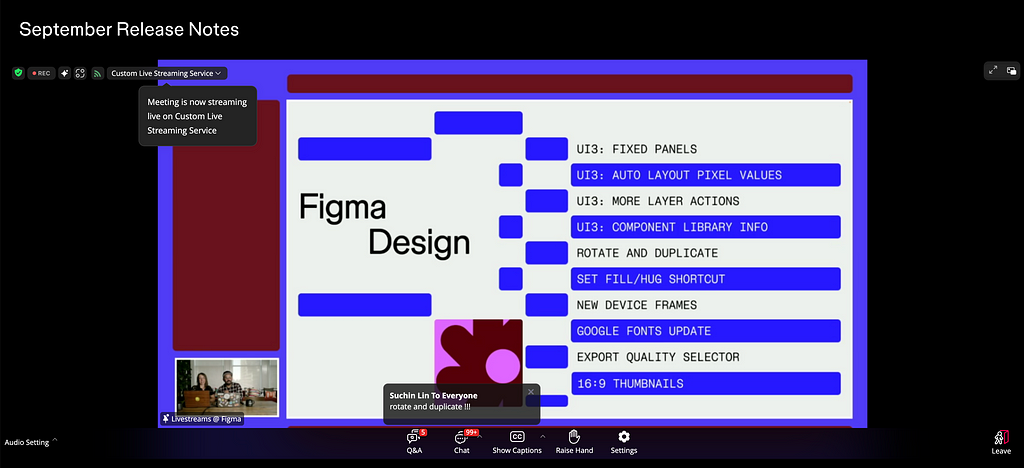
If you missed it, I got you! I’ll cover the big news and feature highlights for Figma Design below.
1. No more floating panels in UI3
This announcement surprised me. The floating panels, housing the Layers and Properties, were such a staple to Figma’s new look from the UI3 update. Since I’ve had the update for a couple months, the floating panels had grown on me. The floating panels gave more visual weight to what was on the canvas, and all tools (and actions) popped out on the UI.
Figma backed up removing the floating panels by referencing user feedback mentioning the “canvas felt smaller” and the “gaps were distracting”. I get that some didn’t like the floating panels, but that comes with the territory of any redesign. So it’s strange they’ve made the decision to revert to UI2.
Back to fixed panels, and RIP floating panels.
2. Everyone gets UI3 on October 10th
Big news for those still waiting for UI3! The wait’s end is in sight. By next Friday, October 10th, every user should (hopefully) have the update. I received the UI3 update on my work account (enterprise plan), but my personal account (free plan) didn’t, so it’s been swapping between the UIs.
And if you’re someone who doesn’t want to swap to UI3 quite yet, UI2 will still be available. Figma hasn’t announced an official deprecation date, but I predict it will be around January 2025. This date lines up with when Figma will start charging for beta features, like Figma Slides.
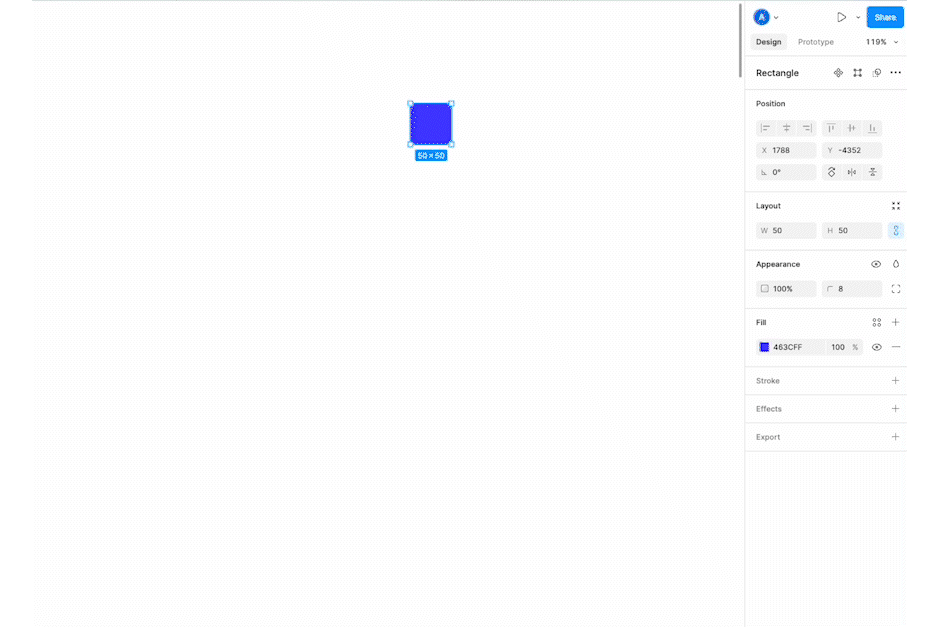
3. Visible auto-layout pixel values
In the initial UI3 , I couldn’t tell you how many pixels wide my frame was, but I sure could tell you it was set to fill. Figma prioritized the frame’s auto-layout details over the pixel values of the frame. But in the new update, the frame’s height and width values will always be visible (thankfully).
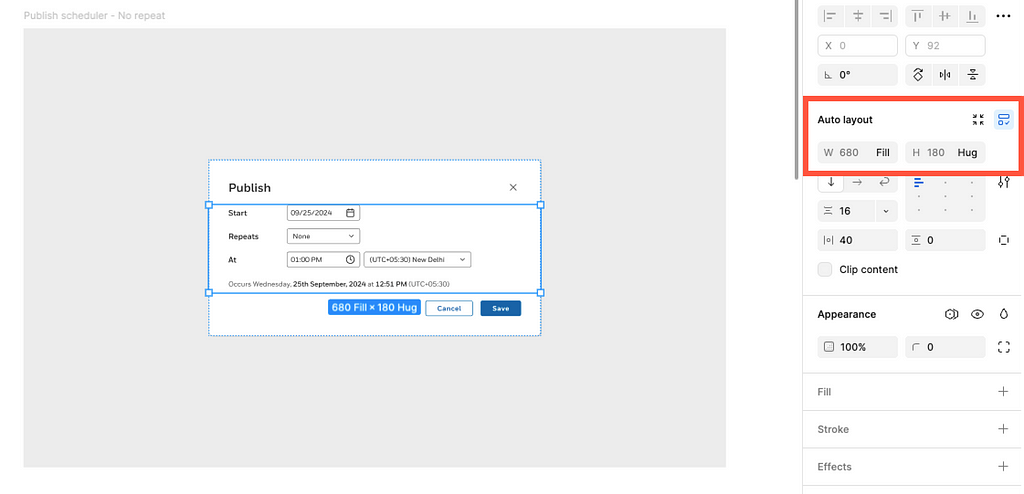
To get the pixel values for the frame previously, I had to hover over the height and width text boxes in the Properties panel. I can’t tell you how many times I did this since getting access to UI3. It was a pain.
Though I’m still sad about the floating panels, I’m glad Figma reverted this decision. I know they were trying to reduce cognitive load in the Properties panel, but this took critical details away. Thank you, Figma.
4. Auto-layout updates
In other auto-layout news, you can now use the “Quick actions” toolbar to modify auto-layout. To do this:
- Select the frame with auto-layout
- Select “Actions” from the toolbar (or use Command+K)
- Search “hug” or “fill” in the search bar
- Select the adjustment you need
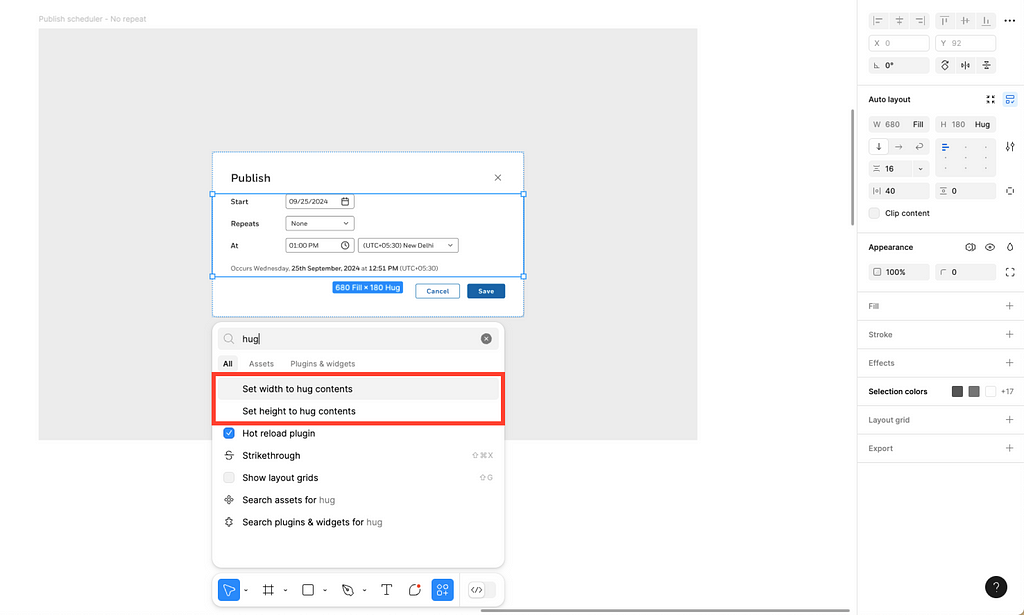
I wouldn’t say this is the most usable way to add auto-layout or modify it (at least in my Figma workflow), but this adds a new way to do. Maybe this is just paving the way for new keyboard shortcuts in the near future…
I’m optimistic this will improve.
5. Duplicate rotations
I didn’t know I needed this one, but now I do. Previously, if I created a duplicate element with a rotation and wanted the following duplicates to continue the rotation pattern, it wasn’t possible. Now, it is possible.
All you have to do is create a duplicate of an element:
- Use Command+D or CTRL+D to create the first duplicate
- Move the duplicate to your liking
- Add the rotation
- Duplicate the duplicate (using Command+D or CTRL+D) → Repeat
The new duplicate will follow the move and rotation pattern. For example, if you move a duplicate by 100 pixels for the X and Y coordinates, then rotate it by 30 degrees, the duplicate will move an additional 100 pixels in the XY coordinates and rotate another 30 degrees.
It’s the small wins for me.
6. Enhanced measurements in Dev mode
Dev mode makes it easy to find and inspect size, padding, and margins. But if there’s any measurement you really want your developer to know (maybe they keep getting the padding wrong), you can make a specific measurement visible.
In Dev mode:
- Use the measure tool to select one element’s side (select the red indicator lines that show on hover)
- Drag to an adjacent element to get the measurement value
- Drag the value outside the design for better visibility
Don’t worry, you can easily select any measurement to delete it from the canvas as you make any updates.
I can’t believe I used to do this manually back in the day. Such a game-changer for documentation.
7. Consistent thumbnail aspect ratio
We all now know our thumbnail’s aspect ratio should be 16:9 no matter what kind of Figma file the thumbnail is for. The recommendation for the aspect ratio used to be different depending on the type of Figma file, like a community or a design file.
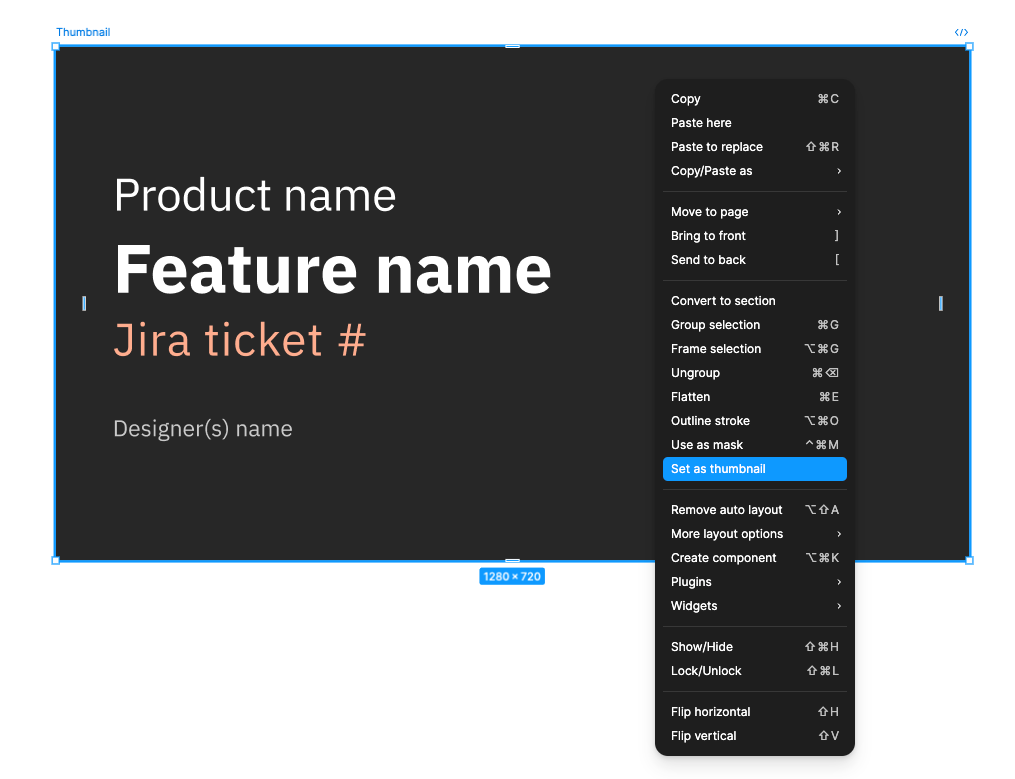
As examples of this aspect ratio, you can use 1280 by 720px or 1980 by 1080px. Just remember it’s 16:9 for thumbnails across the (Figma) board.
8. More Google fonts
I will never complain about more fonts (or typefaces) in a design tool. Hundreds of new Google fonts were recently added to Figma. To access them:
- Select a text layer on the canvas
- Select the text dropdown in the Properties panel
- Select the dropdown below the search bar
- Choose how you want to filter the fonts (I have “Google fonts — 8/24 update” chosen)
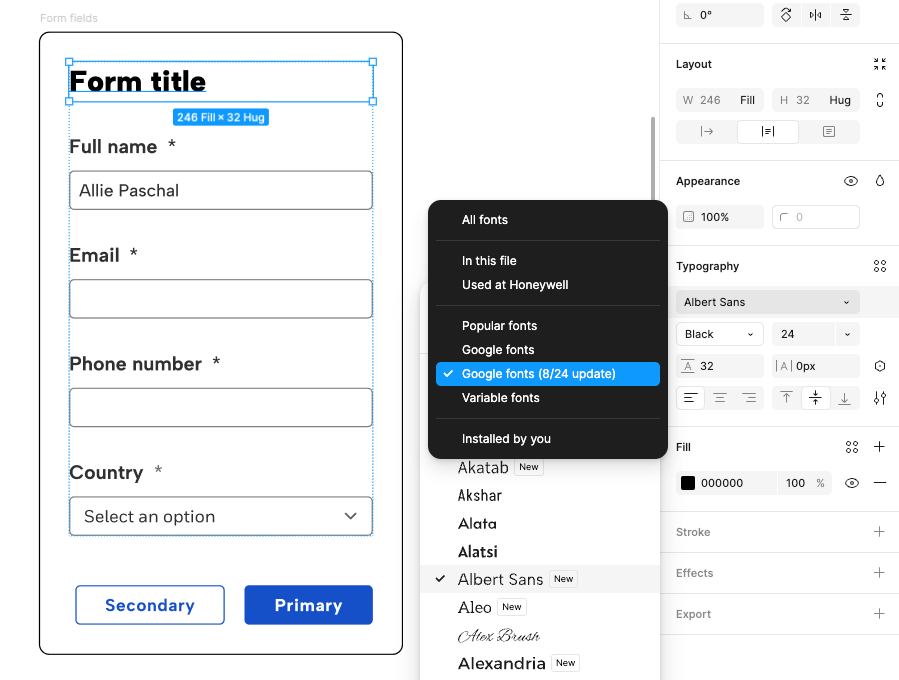
If it’s too many fonts for you, you can filter the fonts you see in the dropdown list, like “Installed by you” or “Used at <company name>”.
Since the initial livestream date, Figma hasn’t posted the recording. Once they do, I’ll link it here for reference. In the meantime, you can read the release notes via Figma’s Release Notes webpage, which are up to date.
Thank you for reading! I hope this helped you learn one new tip or trick in Figma. Let me know in the comments which update you’re most excited about in UI3.
Figma scrapes UI3's floating panels was originally published in UX Collective on Medium, where people are continuing the conversation by highlighting and responding to this story.
Leave a Reply